Office 365 journaling setup
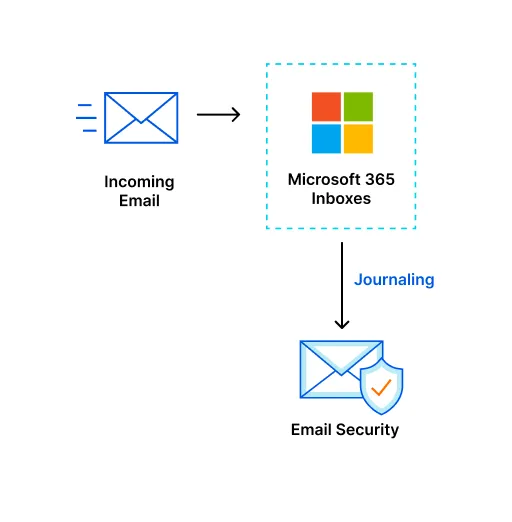
When you receive an email, the email lands on your Microsoft O365 inbox, and then Email Security receives a copy of that email. The following email flow shows how this works:

To enable Microsoft 365 journaling deployment:
- Log in to Zero Trust ↗.
- Select Zero Trust.
- Select Email Security.
- Select Monitoring: If you have not purchased Email Security, select Contact Sales. Otherwise, select Connect a domain.
- Select BCC/Journaling.
- Select Integrate with MS > Authorize.
To integrate with Microsoft O365:
- Name integration: Add your integration name, then select Continue.
- Authorize integration:
- Select Authorize. Selecting Authorize will take you to the Microsoft Sign in page where you will have to enter your email address.
- Once you enter your email address, select Next.
- After selecting Next, the dashboard will show you a dialog box with a list of requested permissions. Select Accept to authorize Email Security. Upon authorization, you will be redirected to a page where you can review details and enroll the integration.
- Review details: Review your integration details, then:
- Select Complete Email Security set up where you will be able to connect your domains and configure auto-moves.
- Select Continue to Email Security.
Continue with Connect your domains for the next steps.
On the Set up Email Security page:
- Connect domains: Select at least one domain. Then, select Continue.
- (Optional) Add manual domains: Select Add domain name to manually enter additional domains. Then, select Continue.
- (Optional) Adjust hop count: Enter the number of hops. Then, select Continue.
- (Optional, select Skip for now to skip this step) Move messages: Refer to Auto-moves to configure auto-moves. Then, select Continue.
- Configure service address with your third party email provider: Copy and paste the service address into your third-party email provider to allow BCC/Journaling:
<account tag>@CF-emailsecurity.com. - Review details: Review your connected domains. Then, select Go to domains.
Your domains are now added successfully.
To view your connected domains:
- Go to Settings.
- Locate your domain, select the three dots > View domain. Selecting View domain will display information about your domain.