JumpCloud
-
Log in to the JumpCloud Admin Portal ↗.
-
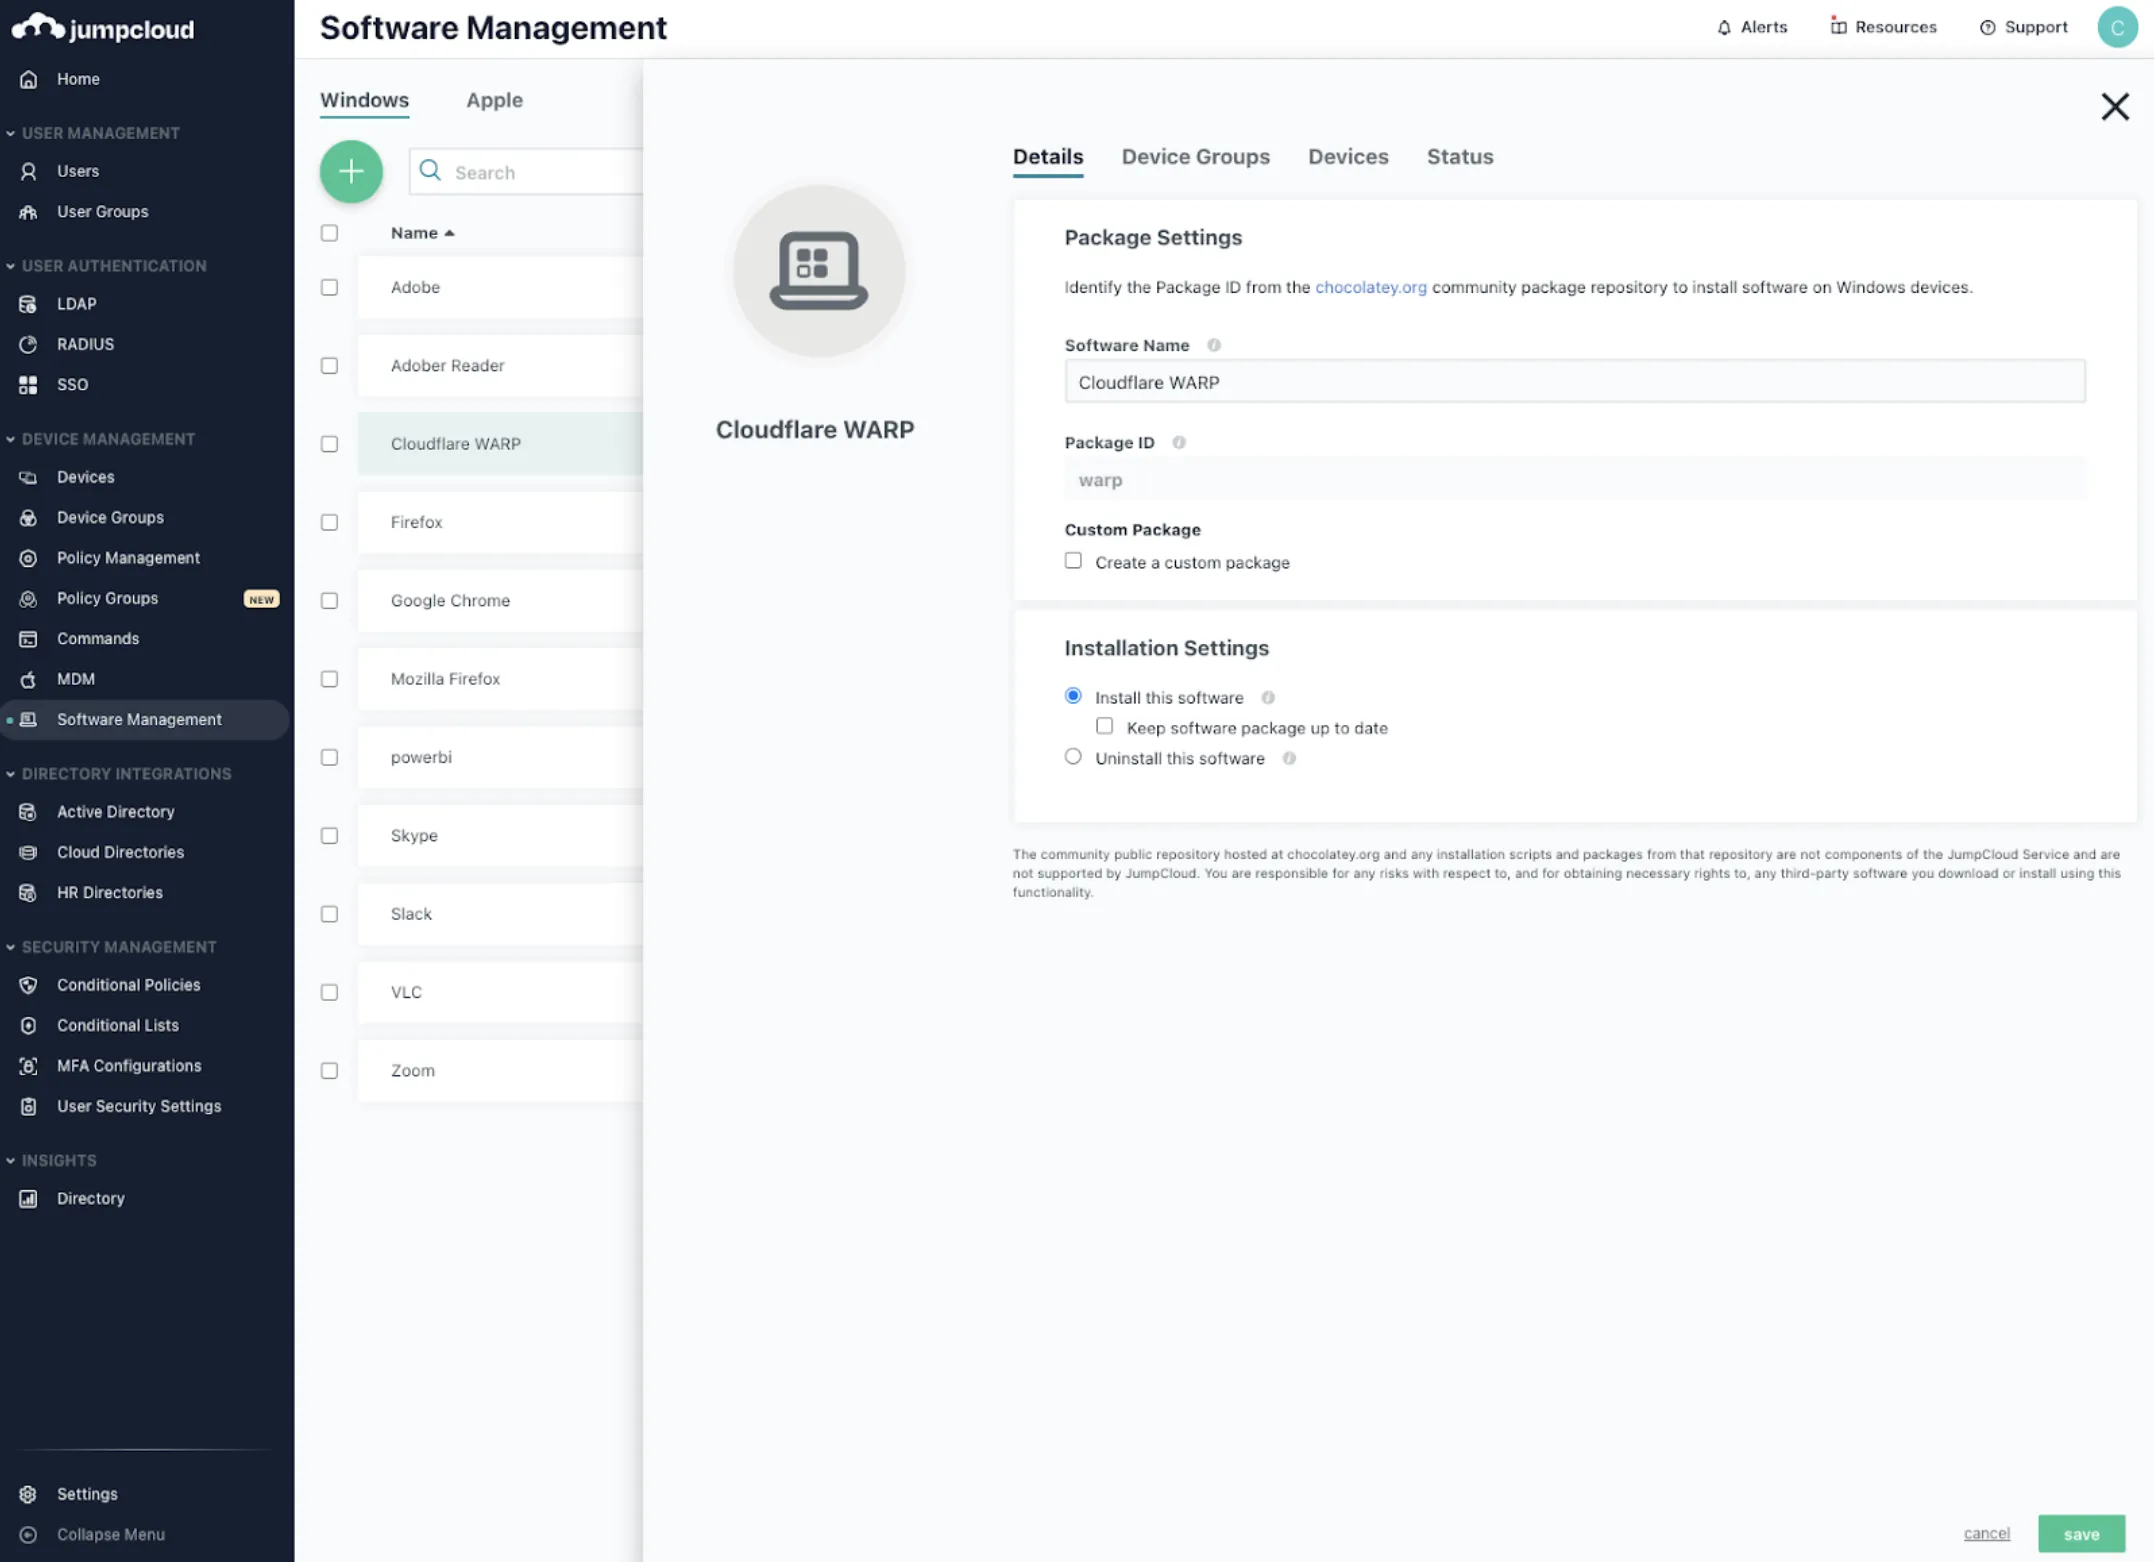
Go to Device Management > Software Management.
-
Select the Windows tab, then select (+).

-
In the Software Name field, enter a unique display name.
-
In the Package ID field, enter
warp. -
Select Install this software.
-
(Optional) Select Keep software package up to date to automatically update this app as updates become available.
-
(Optional) Select Allow end users to delay updates for up to one week to avoid updates during a busy time.
-
Select save.
-
Select the device(s) you want to deploy the app to:
- Single device: Go to the Devices tab and select the target device.
- Device group: Go to the Device Groups tab and select the target device group.
-
Select save.
-
Select save again.
Verify that Cloudflare WARP was installed by selecting the app and viewing the Status tab.
-
Log in to the JumpCloud Admin Portal ↗.
-
Go to Device Management > Software Management.
-
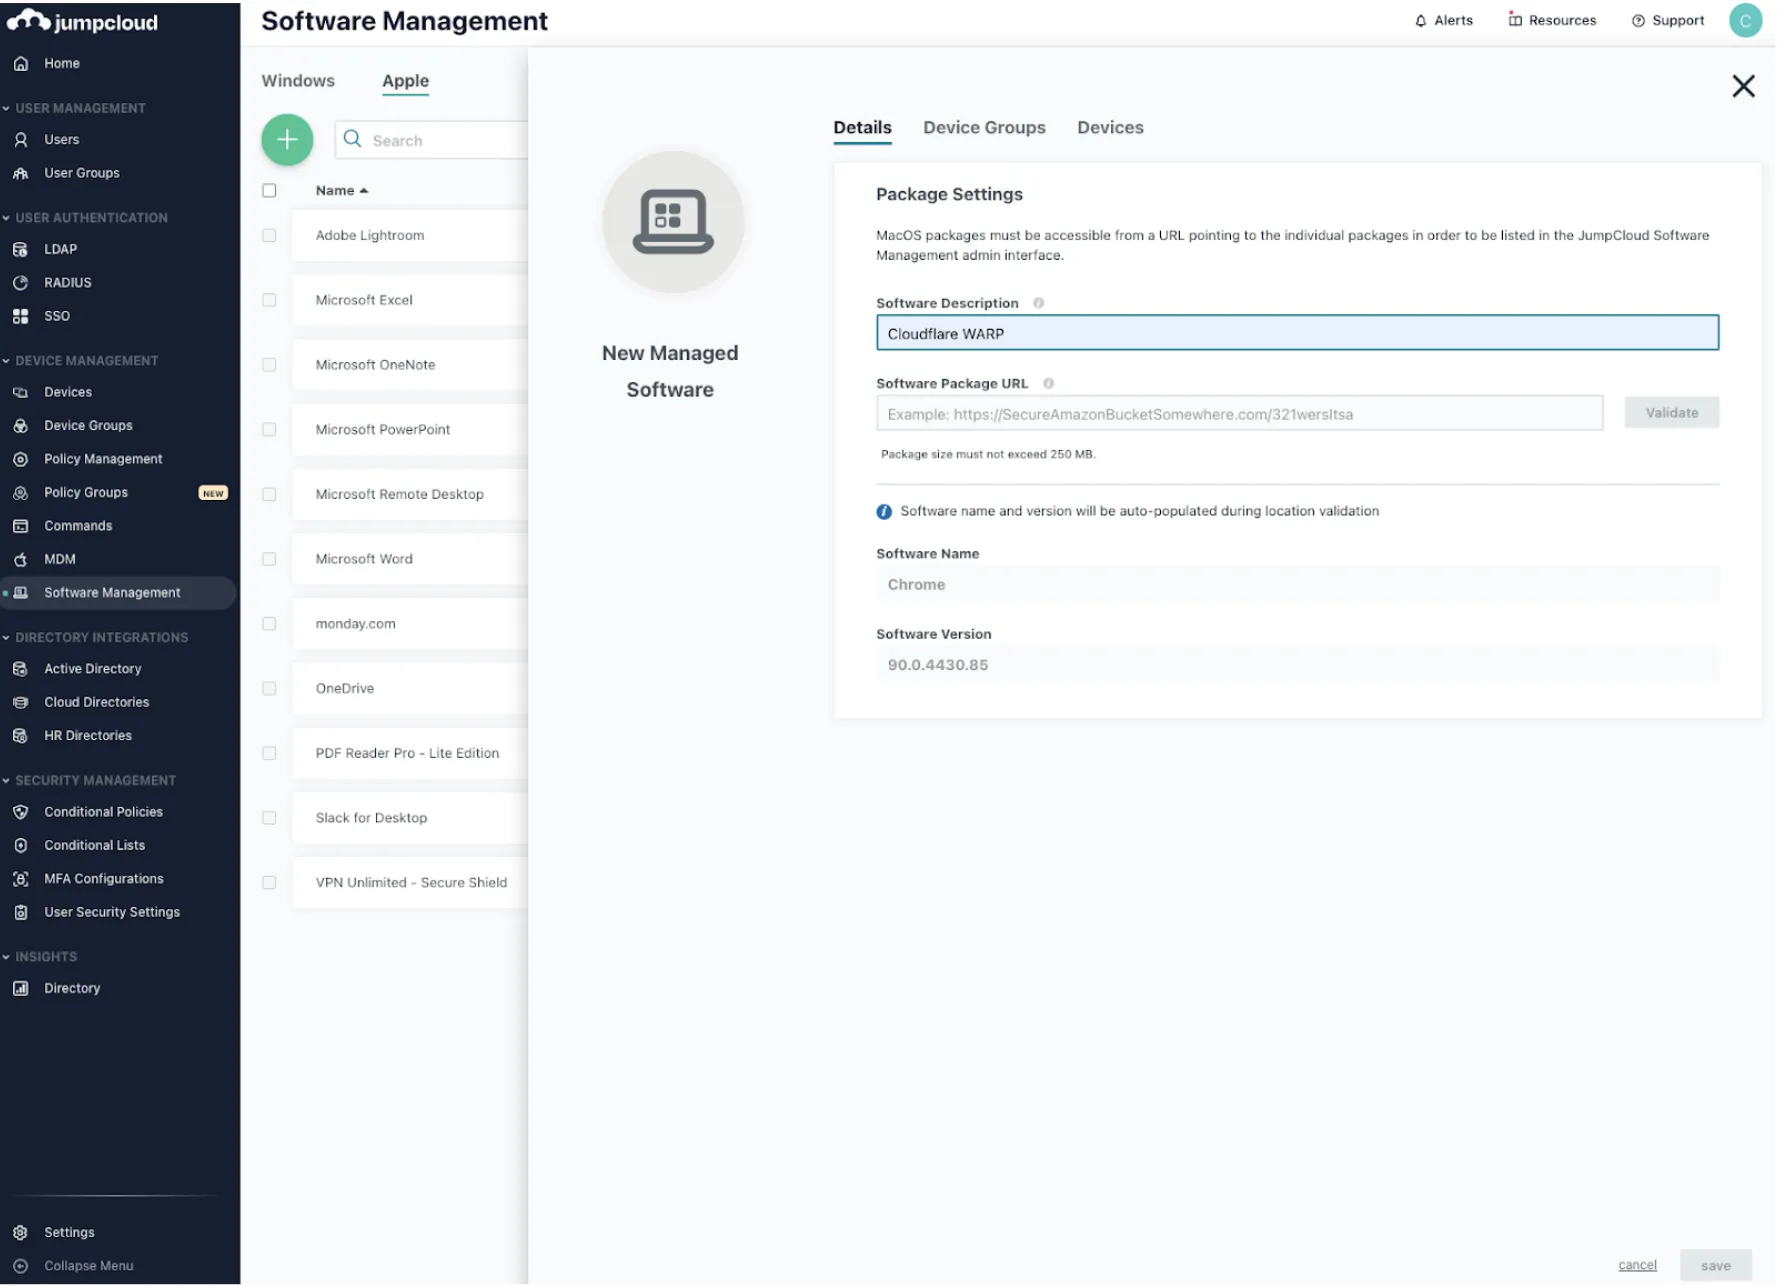
Select the Apple tab, then select (+).

-
In the Software Description field, enter a unique display name.
-
In the Software Package URL, enter the URL location of the
Cloudflare_WARP_<VERSION>.pkgfile. If you do not already have the installer package, download it here. -
Select the device(s) you want to deploy the app to:
- Single device: Go to the Devices tab and select the target device. To select all devices, select the checkbox next to Type.
- Device group: Go to the Device Groups tab and select the target device group. To select all device groups, select the checkbox next to Type.
-
Select save to install the client.
Verify that Cloudflare WARP was installed by selecting the app and viewing the Status tab.